
In addition to being the most widely used video-sharing website worldwide, YouTube is the second most visited website. YouTube marketing is worth your time, regardless of whether you want to increase the marketing efforts of your small business or have an online blog and want to promote your free website.
Concerned about entering this unfamiliar world? Never be. Fortunately, creating a YouTube channel and adding videos to it is rather easy. We’ll walk you through the process of uploading a video to your YouTube channel in detail in this article.
Prior to publishing your video
Verify that YouTube will play your video file. Make sure the platform supports your video format before you can successfully publish your video to YouTube. Fortunately, most file formats are supported since YouTube is a video-only platform. The complete list is available here:
- .MOV
- .MPEG4
- .MP4
- .AVI
- .WMV
- .MPEGPS
- .FLV
- 3GPP
- WebM
- DNxHR
- ProRes
- CineForm
- HEVC (h265)
You will need to export your video file type again using a supported format if it isn’t included in the list above. For assistance with conversion, you may also use YouTube’s troubleshooter. You should check out here if you are new to video creation.
A guide to YouTube video uploading
Step 1: Enter your YouTube login information.[/vc_column_text]
Step 2: Next to your user icon, messages, apps, and notifications, in the upper right corner of the window, click the video icon.
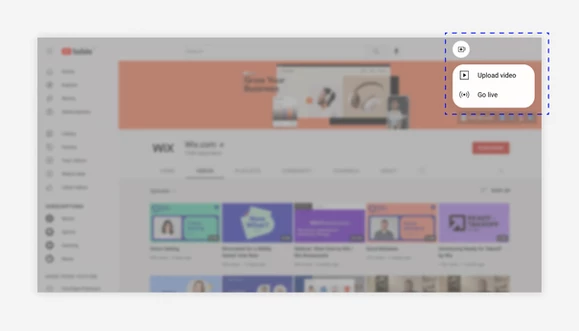
Step 3: Then select “Upload a Video.”
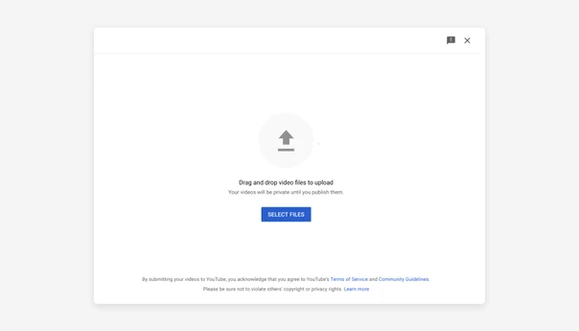
Step 4: Once you’ve located the video file saved on your computer, click “Select files.” You might also simply drag and drop it into the window.
Step 5: Post your video now. Additionally, you have the option of scheduling your post.
Finalize your YouTube video’s details
Include information like privacy settings, thumbnail stills, and SEO data to make sure your movie performs at its best.
Choose your privacy preferences.
Your video’s privacy settings let you decide who may and cannot view it. The following options are available on YouTube throughout the uploading process:
Public: Your video will appear in YouTube search results and be accessible to everyone. This is the default setting, and you should make your videos public if you plan to use YouTube to sell your company or increase your audience.
Unlisted: Videos that aren’t listed are still accessible to the public, but you’ll have to give viewers a direct URL to access the video. Additionally, neither your video stream nor the YouTube search results will contain these videos. Unlisted films can be used for marketing to advertise special offers or events.
Private: You alone have access to view.
Click “Save” after choosing your preferred choice.
Improve the SEO of your video.
By clearly expressing your video’s content, YouTube SEO raises the possibility that your video will show up in both Google and YouTube search results.
Use a tool like Google Keyword Planner or Wordstream to undertake keyword research to get going. This aids in identifying the pertinent search terms and expressions your target audience uses. They’ll be more inclined to watch your video if it appears in search results this way.
When submitting your video, change the file name, description, and title to reflect your chosen keywords.
Additional information
Audio:
After uploading your video, you can edit the audio track using music and sound effects from YouTube’s extensive (and free) audio library.
Blur faces:
From the “Enhancements” tab, blur the faces of anyone who appears in your movie. The ‘Custom Blur’ option gives you additional control over the setting.
End screens:
Include an end screen in your video’s final 5–20 seconds that displays links, subscribe buttons, playlists, and other content. To make the procedure simpler, you can even use templates.
Cards:
Cards can display personalized pictures, headings, and calls to action while directing users to a specified link (from a list of acceptable websites).
Closed captions are simple to include in videos thanks to YouTube:
Just choose the language and add a file. You can use transcription to have YouTube automatically sync the spoken portions of your video for more accurate captions.
Select a thumbnail.
The image viewers see when navigating through your feed is your video thumbnail. Ensure the image you pick is clear, appropriately represents your film, and encourages clicks.
Bottom Line
Once your film has been properly published to YouTube, it can be found by others. However, you can also promote yourself if you want to succeed as a YouTuber. To increase the number of views, share the link on social media and with your family, friends, and other acquaintances. You might potentially earn money on YouTube as you increase the popularity of your channel.
Make sure to perform the following to keep both your website and YouTube channel updated and looking good:
To add a recently published YouTube video or playlist to your website, use a tool like Wix Video.
Create quick movies that you can embed on your website with Wix’s video maker, and then use Wix Video to submit them directly to YouTube.
To automatically add new videos to your website, sync your website with your YouTube channel.